Spring Boot Handbook

    Data Binding and Validation in Spring Boot: Using @ModelAttribute, @Valid, and Validation Annotations

    In modern web applications, handling user input effectively is crucial for a smooth user experience and data integrity. Spring Boot offers powerful tools for managing data binding and validation through annotations like @ModelAttribute, @Valid, and validation annotations. This article will introduce these concepts in a beginner-friendly manner, providing a solid foundation for their application in real-world scenarios.

    What is Data Binding?#

    Data binding is the process of transferring data between a user interface and the server-side application. In the context of web applications, this means mapping form data from an HTML form to a Java object on the server. Spring Boot simplifies this process through the use of @ModelAttribute.

    Understanding @ModelAttribute#

    The @ModelAttribute annotation in Spring Boot is used to bind form data to a Java object. This allows you to automatically populate a model object with data from an HTML form submission. Here’s how it works:

    Define a Model Class: Create a Java class representing the form data.#

    Add Validation Constraints: Use validation annotations from the javax.validation.constraints package in your model class.

    @Data @AllArgsConstructor @NoArgsConstructor public class User { @NotBlank(message = "Name is required") @Size(min = 2, message = "Name must be at least 2 characters") private String name; @NotBlank(message = "Email is required") @Email(message = "Invalid email format") private String email; @NotNull(message = "Age is required") @Min(value = 18, message = "You must be at least 18 years old") private Integer age; }

    Validation Annotations Explained#

    • @NotBlank: Ensures that the field is not empty or null. Useful for strings.
    • @Email: Validates that the string is a valid email format.
    • @Size: Validates the length of the field. E.g., @Size(min = 2, max = 30).
    • @Min: Validates Integer number has to be aleast specified value. and not less than it.

    Create a Controller Method: Use @ModelAttribute to bind form data to the model class.#

    @Controller public class UserController { @GetMapping("/register") public String showRegistrationForm(Model model) { model.addAttribute("user", new User()); return "registration"; // Thymeleaf will look for src/main/resources/templates/registration.html } @PostMapping("/register") public String registerUser(@Valid @ModelAttribute User user, BindingResult result, Model model) { if (result.hasErrors()) { return "registration"; // Thymeleaf will return to src/main/resources/templates/registration.html } // Process user registration model.addAttribute("user", user); // Add the user to the model to show in result return "result"; // Thymeleaf will look for src/main/resources/templates/result.html } @ModelAttribute public void addCommonAttributes(Model model) { model.addAttribute("commonTitle", "User Registration System"); } }

    Design a Form View: Create an HTML form that binds to the User object.#

    <!DOCTYPE html> <html xmlns:th="<http://www.thymeleaf.org>"> <head> <title>Registration</title> </head> <body> <h1 th:text="${commonTitle}">User Registration</h1> <form th:action="@{/register}" th:object="${user}" method="post"> <div> <label for="name">Name:</label> <input th:field="*{name}" id="name" /> <div th:if="${#fields.hasErrors('name')}" th:errors="*{name}">Name Error</div> </div> <div> <label for="email">Email:</label> <input th:field="*{email}" id="email" /> <div th:if="${#fields.hasErrors('email')}" th:errors="*{email}">Email Error</div> </div> <div> <label for="age">Age:</label> <input th:field="*{age}" id="age" /> <div th:if="${#fields.hasErrors('age')}" th:errors="*{age}">Age Error</div> </div> <button type="submit">Register</button> </form> </body> </html>

    Modify your form view to display validation errors: In this example, Thymeleaf (a popular template engine) is used to display error messages. The th:if and th:errors attributes check for and display validation errors associated with each field.

    Create result.html to show registered users details#

    <!DOCTYPE html> <html xmlns:th="<http://www.thymeleaf.org>"> <head> <title>Registration Result</title> </head> <body> <h1 th:text="${commonTitle}">User Registration</h1> <h1>Registration Successful!</h1> <p>Here are the details you submitted:</p> <ul> <li><strong>Name:</strong> <span th:text="${user.name}"></span></li> <li><strong>Email:</strong> <span th:text="${user.email}"></span></li> <li><strong>Age:</strong> <span th:text="${user.age}"></span></li> </ul> <a href="/register">Go back to registration form</a> </body> </html>

    Run the application and hit the endpoint on browser#

    Enter invalid values and in field you will see the errors.

    Registration error page

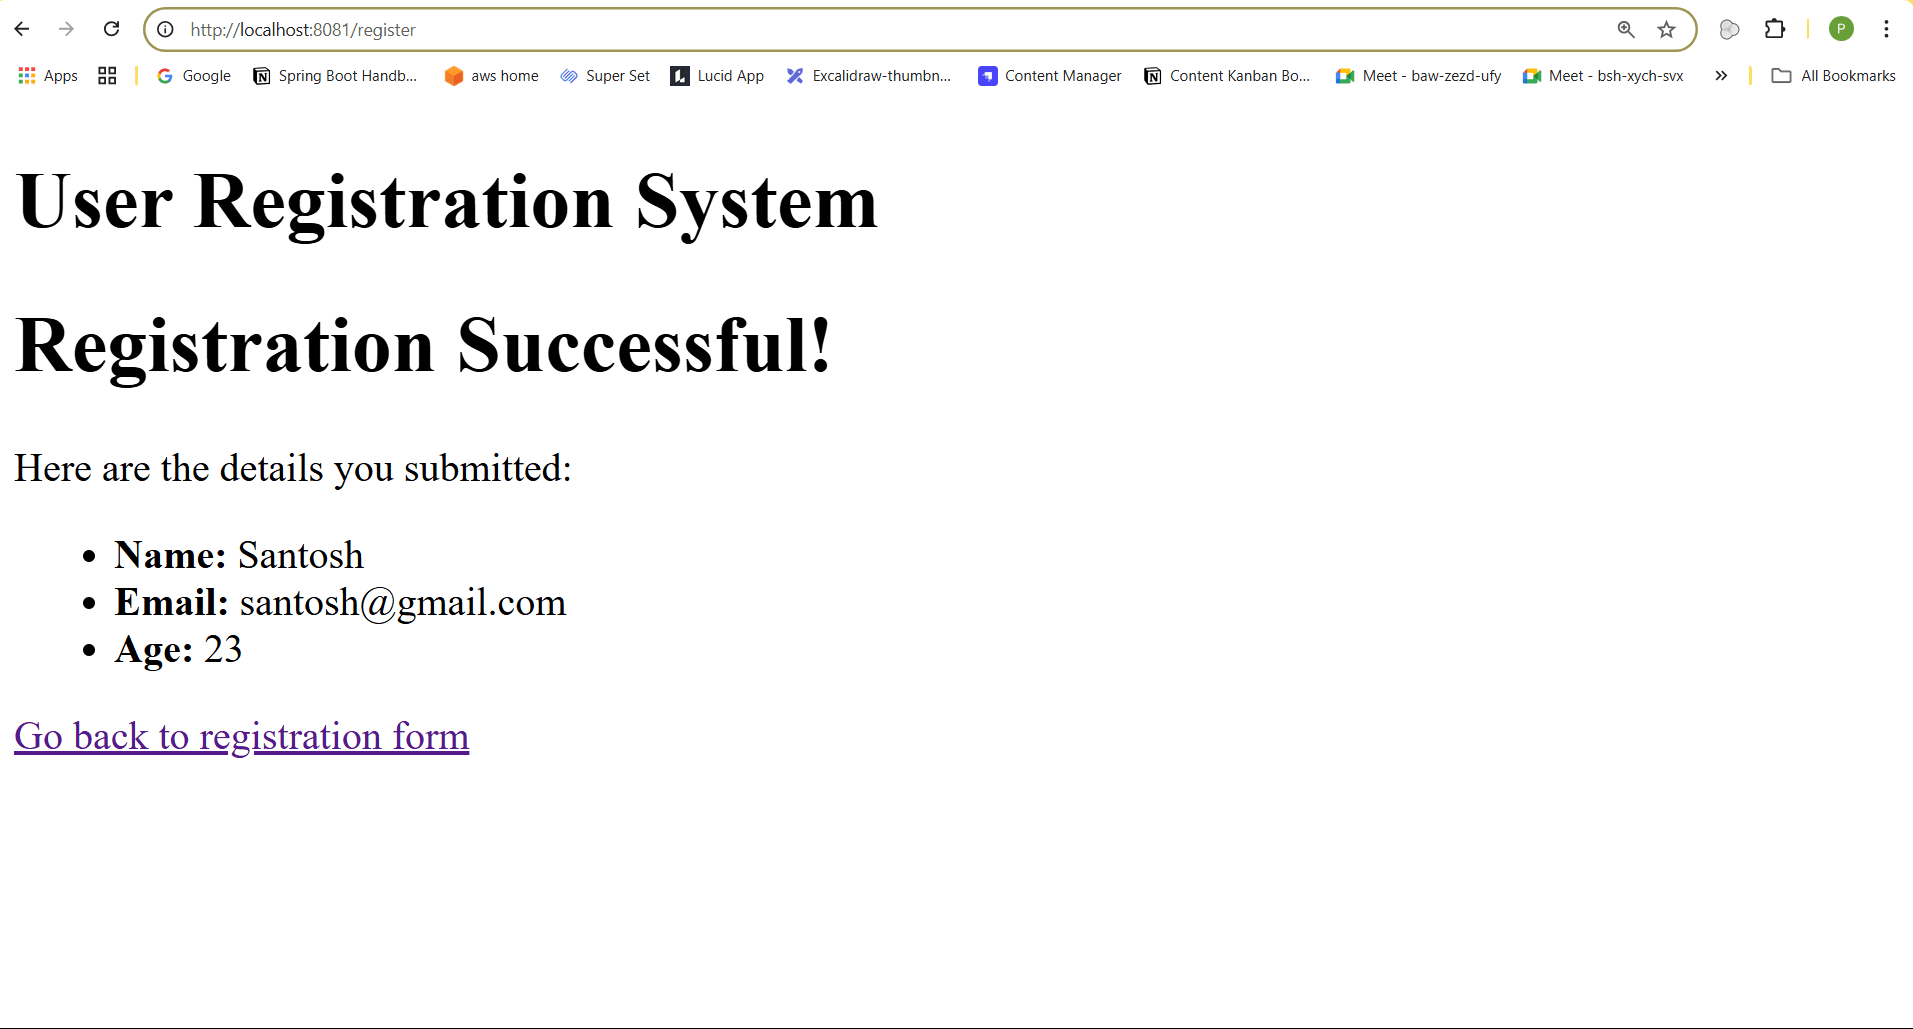
    After Entering the valid values in field you will be redirected to result page .

    Registration success page

    In this article, we explored the crucial concepts of data binding and validation in Spring Boot using annotations like @ModelAttribute, @Valid, and various validation annotations. We demonstrated how to bind form data to a Java object seamlessly and validate user input effectively to ensure data integrity and a smooth user experience. With practical examples and a step-by-step approach, you now have a solid foundation to implement these techniques in your own web applications.

    Want to Master Spring Boot and Land Your Dream Job?

    Struggling with coding interviews? Learn Data Structures & Algorithms (DSA) with our expert-led course. Build strong problem-solving skills, write optimized code, and crack top tech interviews with ease

    Learn more

    Last updated on Dec 28, 2024

    Subscribe to our newsletter

    Read articles from Coding Shuttle directly inside your inbox. Subscribe to the newsletter, and don't miss out.