Install Docker Desktop on Mac
Let’s now walk through how to install Docker Desktop on macOS. We’ll cover two approaches:
- Interactive installation using the official Docker Desktop installer (GUI-based setup).
- Command-line installation using the Homebrew package manager for macOS.
Both methods are straightforward, and you can choose the one that best fits your workflow, whether you prefer a guided installation experience or a terminal-driven setup.
System requirements#
- A supported version of macOS.
- At least 4 GB of RAM.
Download Links#
Docker Desktop for Mac with Apple sillicon
Docker Desktop for Mac with Intel chip
Install interactively#
1. Download the installer using the download links given at the top of the page.
2. Double-click Docker.dmg to open the installer, then drag the Docker icon to the Applications folder. By default, Docker Desktop is installed at /Applications/Docker.app

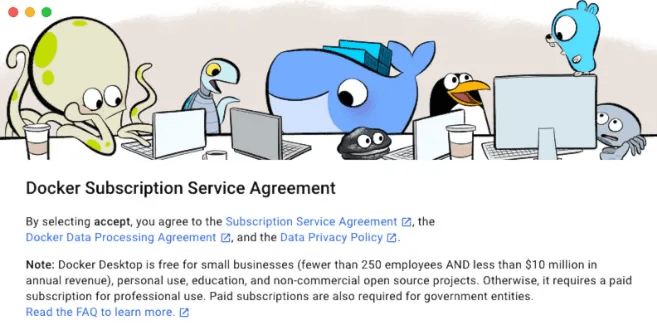
3. Double-click Docker.app in the Applications folder to start Docker. The Docker menu displays the Docker Subscription Service Agreement. Accept to continue.
4. Docker Desktop will display the Docker subscription agreement. Read through the agreement and click on the “Accept” button to accept the terms and proceed with Sign in/Signup.
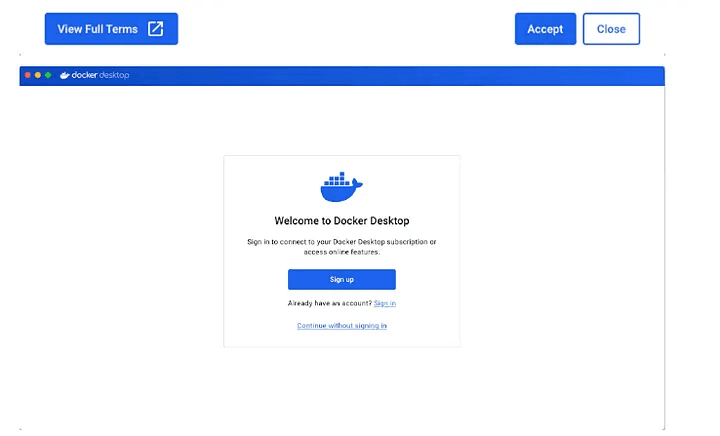
5. Once Docker Desktop finishes initializing, you will see the Docker Desktop user interface. Look for the Docker icon in the menu bar at the top of your screen. If you see the Docker whale icon, Docker Desktop is running.
6. To further verify the installation, open the Terminal and run the following command:
Install using Homebrew#
If you prefer using the command line and package managers, you can install Docker Desktop on your Mac using Homebrew.
1. Install Homebrew
In the Terminal, paste the following command and press Enter: This command will download and install Homebrew on your Mac.
2. With Homebrew installed, you can now use it to install Docker Desktop. In the Terminal, run the following command:
The --cask option specifies that Docker Desktop is a GUI application rather than a command-line tool.
3. Once the installation is complete, you will see a message indicating that Docker Desktop was successfully installed.
The next steps: launch the Docker Desktop and Verify the installations remain same as shown in the previous installation method.
For more help on installation follow the official documentation Mac | Docker Docs
Conclusion#
Installing Docker Desktop on macOS is straightforward, whether you choose the interactive GUI installer or the Homebrew command-line approach. Both methods ensure a smooth setup, allowing you to quickly start building and running containerized applications on your Mac.