Creating Own Docker Network
A network enables multiple devices to communicate with each other and exchange data. In traditional infrastructure, networking allows systems to connect through IP addresses and routing mechanisms. Docker follows the same principle but provides virtual networks that allow containers to communicate in an isolated and controlled environment.
In Docker, a network is a logical layer that facilitates communication between containers, as well as between containers and the host system. When containers are attached to the same Docker network, they can communicate directly with each other without exposing their services to the external host network.
Docker provides built-in DNS-based service discovery, which allows containers on the same network to communicate using container names or service names, rather than relying solely on IP addresses. This simplifies service-to-service communication in containerized applications, especially in microservice architectures.
Steps to create a network and connect container#
While you can use the default bridge network, it's a best practice to create your own for better isolation and automatic service discovery (containers can find each other by name).
Step 1: Create a network first
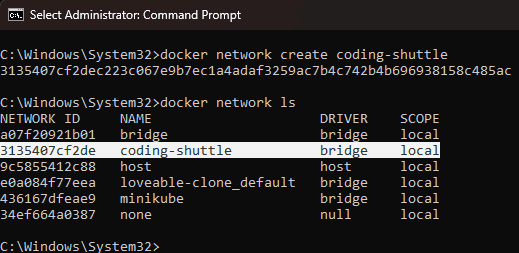
Step 2: Connect a container to the created network
Now lets run two nginx server and connect them to the network created in step 1. For this you can run command docker run -d --name <container-name> --network <network-name> <image-name> If you have already running container and you want to connect it to a network then you can use the command docker network connect <network-name> <container-name-or-id>
The --network flag tells Docker which network to attach the container to.
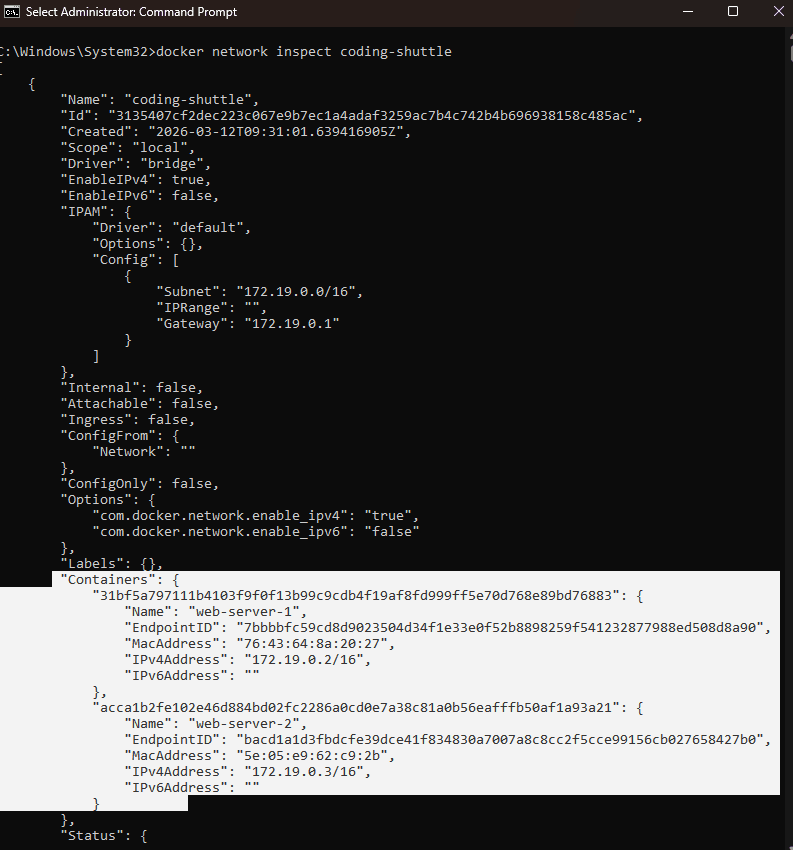
Now if we want to inspect the network and check that which container are connected to the network then we can use the command docker network inspect <network-name>
Step 3: Inspect the network
User command docker network inspect <network-name> to inspect a network. We can also notice the containers list that we connected to the network in step 2.
Step 4: Testing Container-to-Container Communication
Open terminal and ping the container from another as given below.
If they are successfully connected to the same network, then you can expect the below output
Step 5: Disconnecting a Container
To remove a container from a network:
Static IPs with Docker Compose#
You can also setup network with static IPs, for the use docker-compose.yml with custom subnets:
You can now define static IPs under each service’s docker-compose like:
Other wise use command to assign the IP while starting the container
docker run --name <container-name> --network <network-name> --ip <ip-address> <image-name>
Conclusion#
Creating custom Docker networks improves communication, isolation, and service discovery between containers. By connecting containers to the same network, they can communicate securely using container names instead of IP addresses. This capability is essential for building scalable, microservice-based applications where multiple services must interact reliably within the same environment.